How to send new Excel Data to an Existing SharePoint List
If you frequently work with Excel data and need to share it with others, adding it to a SharePoint list can be a convenient and efficient solution. With SharePoint, you can easily collaborate with others and access the data from anywhere. In this tutorial, we will guide you through the process of adding new Excel data to an existing SharePoint list using Power Automate (formerly Microsoft Flow). By following these simple steps, you’ll be able to automate the process of adding new data to your SharePoint list, saving you time and effort.
License Recommended: Microsoft Business Premium
Tools Requirements: SharePoint Online, Excel for Business, Power Automate
Level: Beginner
The Steps
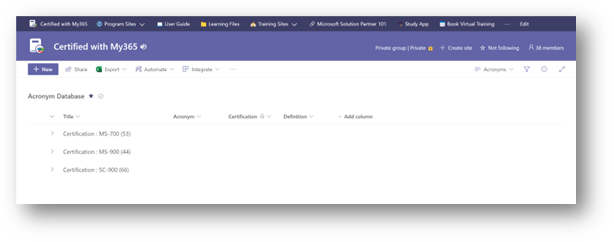
1. Create a SharePoint List
To start, you need to create a SharePoint list with columns and data ready. It’s important to have the columns set up in a way that matches the data you will be sending from Excel. If you don’t have any data to add at this point, that’s okay, you can add it later.
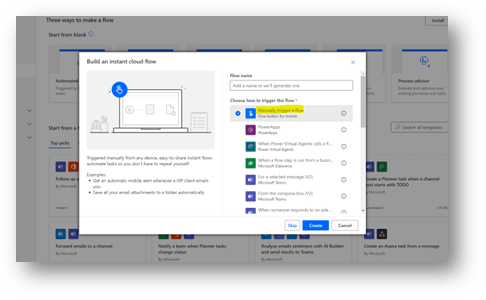
2. Create a MANUAL FLOW in Power Automate
Next, you need to create a Manual Flow in Power Automate, which is a tool for automating tasks and workflows across different applications and services. In this case, you’ll create a flow that will send the data from Excel to SharePoint with a single button press. You’ll need to choose the manual trigger option when setting up the flow.
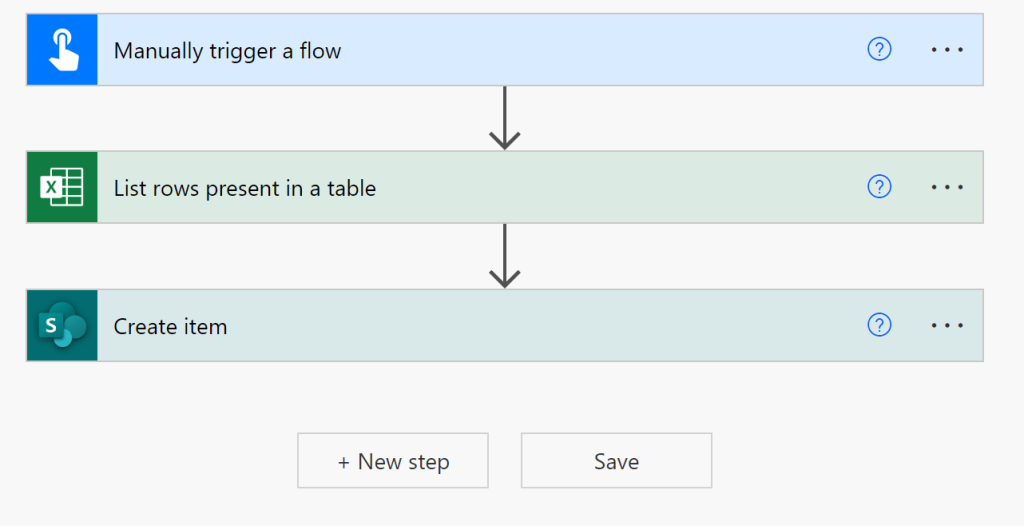
3. Build the Following Steps
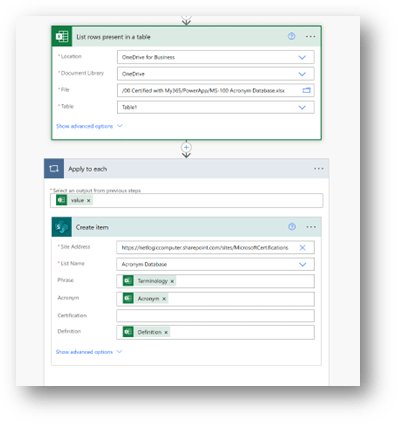
In order to complete the flow, you’ll need to add a few additional steps to it. These are shown in the image below and include manually triggering the flow, listing the rows present in a table, and creating an item in the SharePoint list. You’ll use connectors to set up these steps and line up where the data goes in the flow.
4. Manually Trigger a flow
This step is already set up for you in the manual flow you created. It allows you to manually trigger the flow with a single button press.
5. List rows present in a table
The next step is to find the file in the location you stored it, such as OneDrive, and find the table in the Excel file. Note that you must put the data into a table for this step to work. This step lists the rows present in the table.
6. Create item
Find the SharePoint list you want to enter the data into, then click into the open field, select from Dynamic Content the matching column.
Note: You need the apply to each, it is an automated feature so do not delete it.
First, match content to fields in SharePoint
Simply match the Column in Excel to the Field in SharePoint. You may need to use the search bar, or scroll down in the Dynamic Content to find what you are looking for.
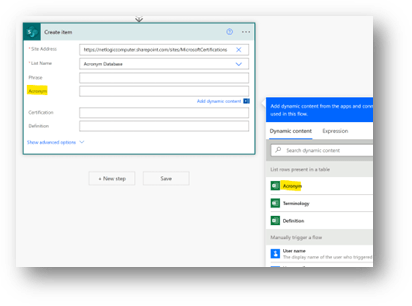
Second, finalize connectors
The Complete Connectors should look like the below screenshot using your content.
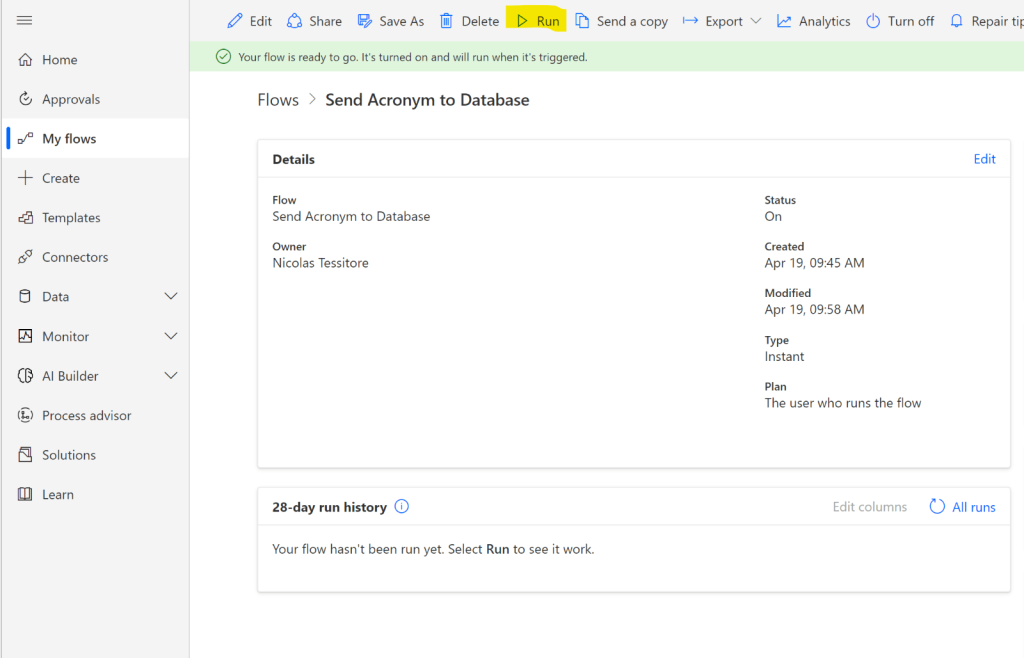
7. Run the Flow
Now that you have matched the content to fields in SharePoint and finalized the connectors, you can run the flow to send all of the data straight to SharePoint Online. This should only take a moment.
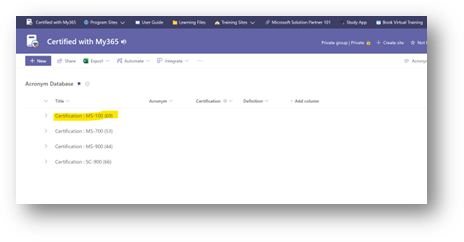
Be sure to check the list to verify your new data arrived!
8. Finally, check SharePoint Online for your data, if the flow fails go to the 28-day run history to find out the issue and troubleshoot.
If everything worked correctly, you should be able to see the data you added to the SharePoint list. If not, you can use the run history to help you identify and resolve any issues.
Adding new Excel data to an existing SharePoint list can be a great way to streamline your workflow and ensure that you and your team have access to the latest information. With Power Automate, this process can be automated and simplified, allowing you to focus on more important tasks. By following the steps outlined in this tutorial, you can easily create a manual flow in Power Automate and add new data from Excel to an existing SharePoint list with just a few clicks. Whether you’re a business owner, a team leader, or an individual user, this tutorial can help you optimize your workflow and stay organized.
Book a meeting if you need help: Power Automate Booking with Netlogic My365